






ASUS-B760-I-REFURB
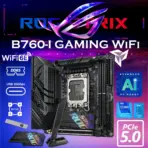
B760-I Gaming WiFi DDR5 Motherboard mini-ITX
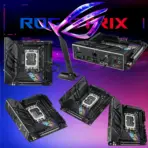
ASUS ROG Strix B760-I Gaming WiFi Intel B760 mini-ITX motherboard, 8 + 1 power stages, DDR5 up to 7600 MT/s, PCIe 5.0, two M.2 slots, WiFi 6E, USB 3.2 Gen 2×2 Type-C, and Aura Sync RGB , For 14th -13th – 12th Gen | REFURB
ASUS ROG Strix B760-I Gaming WiFi Mini-ITX Motherboard, Intel B760 LGA1700, 2x DDR5-7600 OC, PCIe 5.0, Dual M.2, WiFi 6E, 2.5GbE, USB-C 20Gbps, SupremeFX Audio, Aura Sync RGB, For 14th -13th – 12th Gen | REFURB
B760-I Gaming WiFi DDR5 Motherboard mini-ITX B760-I Gaming WiFi DDR5 Motherboard mini-ITX B760-I Gaming WiFi DDR5 Motherboard mini-ITX B760-I Gaming WiFi DDR5 Motherboard mini-ITX B760-I Gaming WiFi DDR5 Motherboard mini-ITX B760-I Gaming WiFi DDR5 Motherboard mini-ITX B760-I Gaming WiFi DDR5 Motherboard mini-ITX B760-I Gaming WiFi DDR5 Motherboard mini-ITX B760-I Gaming WiFi DDR5 Motherboard mini-ITX B760-I Gaming WiFi DDR5 Motherboard mini-ITX
GENERATE AN AI IMAGE
Layout
- Create an exact 2048 × 2048-pixel, perfect 1:1 square website product-profile composition.
- Clearly separate the foreground Mini-ITX motherboard, midground compact gaming-PC interior, and background surreal high-speed gaming-data environment.
- Make the motherboard dominant at approximately 58–64% of the canvas width, large enough for the LGA1700 socket, two DIMM slots, heatsinks, PCIe slot, and rear-I/O architecture to remain instantly recognizable at thumbnail scale.
- Include the mandatory Expert Zone juxtaposition flare: aggressive black ROG gaming circuitry violently contrasted against luxurious pale liquid-pearl sculpture and transparent high-luster architectural forms.
- Keep every PCB edge, heatsink, socket, connector, logo, icon, and title fully inside generous safe margins.
- Never create a poster, banner, vertical layout, wide composition, stage, pedestal, podium, or cropped preview.
Product Presentation
- Use only the exact official reference for the ASUS ROG STRIX B760-I GAMING WIFI.
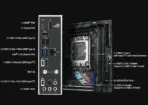
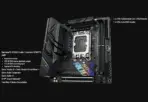
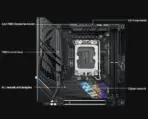
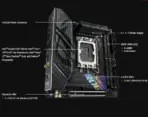
- Preserve the authentic black Mini-ITX PCB, LGA1700 socket, dual DDR5 DIMM slots, angular VRM/I-O heatsink, holographic ROG M.2-heatsink detailing, PCIe SafeSlot, rear-I/O arrangement, and original component geometry.
- Do not enlarge, relocate, delete, recolor, or invent motherboard components.
- Render one exceptionally sharp three-quarter hero view with physically accurate PCB layers, metallic socket hardware, capacitors, chokes, ports, and heatsink machining.
- Brand Logo: Place the authentic ROG logo at the top-left within safe margins.
- Product Name: Center “STRIX B760-I GAMING WIFI” at the top in sophisticated, razor-sharp extruded 3D typography.
- Add the subtitle “DDR5 • PCIe 5.0 • Wi-Fi 6E”.
- Use bright pearlescent-metallic typography with deep iridescent edge separation; never use cheap gaming-poster lettering.
Artistically Distinct and Detailed Background
- Background Story: Show the motherboard naturally installed inside an ultra-compact gaming PC while its tiny 17 × 17cm footprint appears to unleash a disproportionately huge digital battlefield around it.
- Translate PCIe 5.0, DDR5, dual M.2 storage, Wi-Fi 6E, and 2.5Gb networking into surreal flowing lanes of data that bend around the motherboard like impossible glass highways.
- Introduce subtle distant tactical-esports silhouettes and fragmented arena geometry, without reproducing an identifiable copyrighted character or actual game screenshot.
- Make the visual joke sophisticated: a tiny Mini-ITX board controlling an enormous high-performance digital world.
- Background Color Palette: Maintain a dominant pearlescent opaline-white, conch-pearl, luminous cyan, and transparent oily-iridescent palette.
- Since the motherboard is predominantly black, use the pale palette aggressively behind its silhouette for maximum separation.
- Keep black and graphite restricted almost entirely to the physical motherboard itself.
- No graphite fog, gray smog, charcoal clouds, dirty haze, or dark background masses.
- Background Texture: Use only deep transparent opalescent textures and thick dichroic-glass environmental forms.
- Build curved high-gloss pearl reliefs, molten transparent data channels, fluid light-colored metallic surfaces, luminous circuit-like caustics, and sculptural glass airflow channels.
- Use global illumination, dielectric refractions, controlled RGB caustics, gemstone-like iridescence, and minimal matte surfaces strictly for definition.
Icons — Bullet Listed
- AI PC READY
- For 14th -13th – 12th Gen — angular CPU-socket shield.
- 2x DDR5 7600 OC / 96GB — tall hollow memory-tower emblem.
- PCIe 5.0 x16 — elongated high-speed expansion-lane icon.
- Dual M.2 PCIe 4.0 — twin crystalline SSD blades.
- Wi-Fi 6E — sculptural six-band wireless crest.
- Intel 2.5GbE — aggressive network-port lightning badge.
- USB-C 20Gbps — transparent connector-shaped speed emblem.
- SupremeFX S1220A — asymmetric audio-wave crystal.
- CRITICAL DIRECTIVE [STRICT] The Icons MUST Have different shapes depending on the specific content of the icon
- Keep every icon a distinctly different hollowed-out esports 3D freeform, with large, bold, condensed typography readable at thumbnail size.
- Align the icons cleanly along the bottom without turning them into one repetitive row of identical circles.
Output Requirements
- Output exactly 2048 × 2048 pixels.
- Maintain a strict 1:1 square ratio.
- Keep the complete motherboard, logo, title, subtitle, icons, and background fully inside the canvas.
- Preserve razor-sharp PCB edges and extremely clear separation from the background.
- Add discreetly at the bottom: “Infographics Made with ❤️ by the Expert Zone Team”.
- Final result must look like a high-end website product-profile image, never a premium advertising poster.
Constraints
- Do not alter the motherboard layout, heatsinks, socket, DIMM count, PCIe slot, rear I/O, PCB shape, or physical design.
- Do not invent additional M.2 slots, RAM slots, PCIe slots, RGB lighting, Thunderbolt, Wi-Fi 7, or unsupported connectivity.
- Do not use graphite smog, black fog, dirty gray gradients, flat-white emptiness, cheap chrome, or excessive matte surfaces.
- Keep the product large and visually dominant.
- Preserve the mandatory Expert Zone juxtaposition flare.
- Before finalizing, ask: “How does this image fare as a product-profile image?”
- Automatically correct any weak product scale, inaccurate hardware, blurred PCB edges, low contrast, repetitive icon shapes, illegible typography, clutter, or clipping before output.